Final steps
Connect the Mirco Executor to Data Container
With the previous steps, you have built your first Micro Executor in Java, and now you can connect it to the Data container.
1. Create a new compose.override.yaml in the root of your local data-docker-compose repository, with the following contents:
services:
  dispatcher:
    environment:
      - ME_JAVA_TUTORIAL_URL=http://host.docker.internal:8181
2. Inside volumes/kokos-libs/kokos-dsl, register your Micro Executor and related services in register.yaml
handlers:
  me-java-tutorial:
      url: ${ME_JAVA_TUTORIAL_URL:=http://host.docker.internal:8181}

services:
  names:
      X1_X01_01:
          handler: me-java-tutorial
      X1_X01_02:
          handler: me-java-tutorial
3. Run Data with Docker Compose
docker compose --profile default up
4. Run the Micro Executor
Test it on Webup
Now that everything is ready and connected, it is possible to call the Micro Executor inside the webup.js service running in the Data container.
1. Access to http://localhost:80/web/app/sandbox
2. Open the Network tab in your browser's developer tools
3. Call the services with FUN
Inside the search bar, call the services using the following FUNs:
- X1_X01_01:
F(EXB;X1_X01_01;GET) - X1_X01_02:
F(EXB;X1_X01_02;*INIT)
Verify that the JSON responses match the expected output.
Setting Up for the Front-End Tutorial
If you want to proceed with the front-end tutorial section, it's possibile to execute all the steps locally using the
following directories located in volumes/kokos-libs/kokos-dsl/:
- SCP_SCH: for scheda
.schfiles - SCP_LAY: for layout
.layfiles - SCP_LAY: for prototypes
.setfiles
In the search bar of webup.js, write the FUN to open your scheda.
Try creating new scheda
1. Create new scheda
Inside volumes/kokos-libs/kokos-dsl/SCP_SCH create new file TUTORIAL.sch.
::G.SEZ Pos(1)
::G.SUB.MAT Tit="Activities"
::D.FUN.STD F(EXB;X1_X01_01;GET)

::G.SEZ Pos(2)
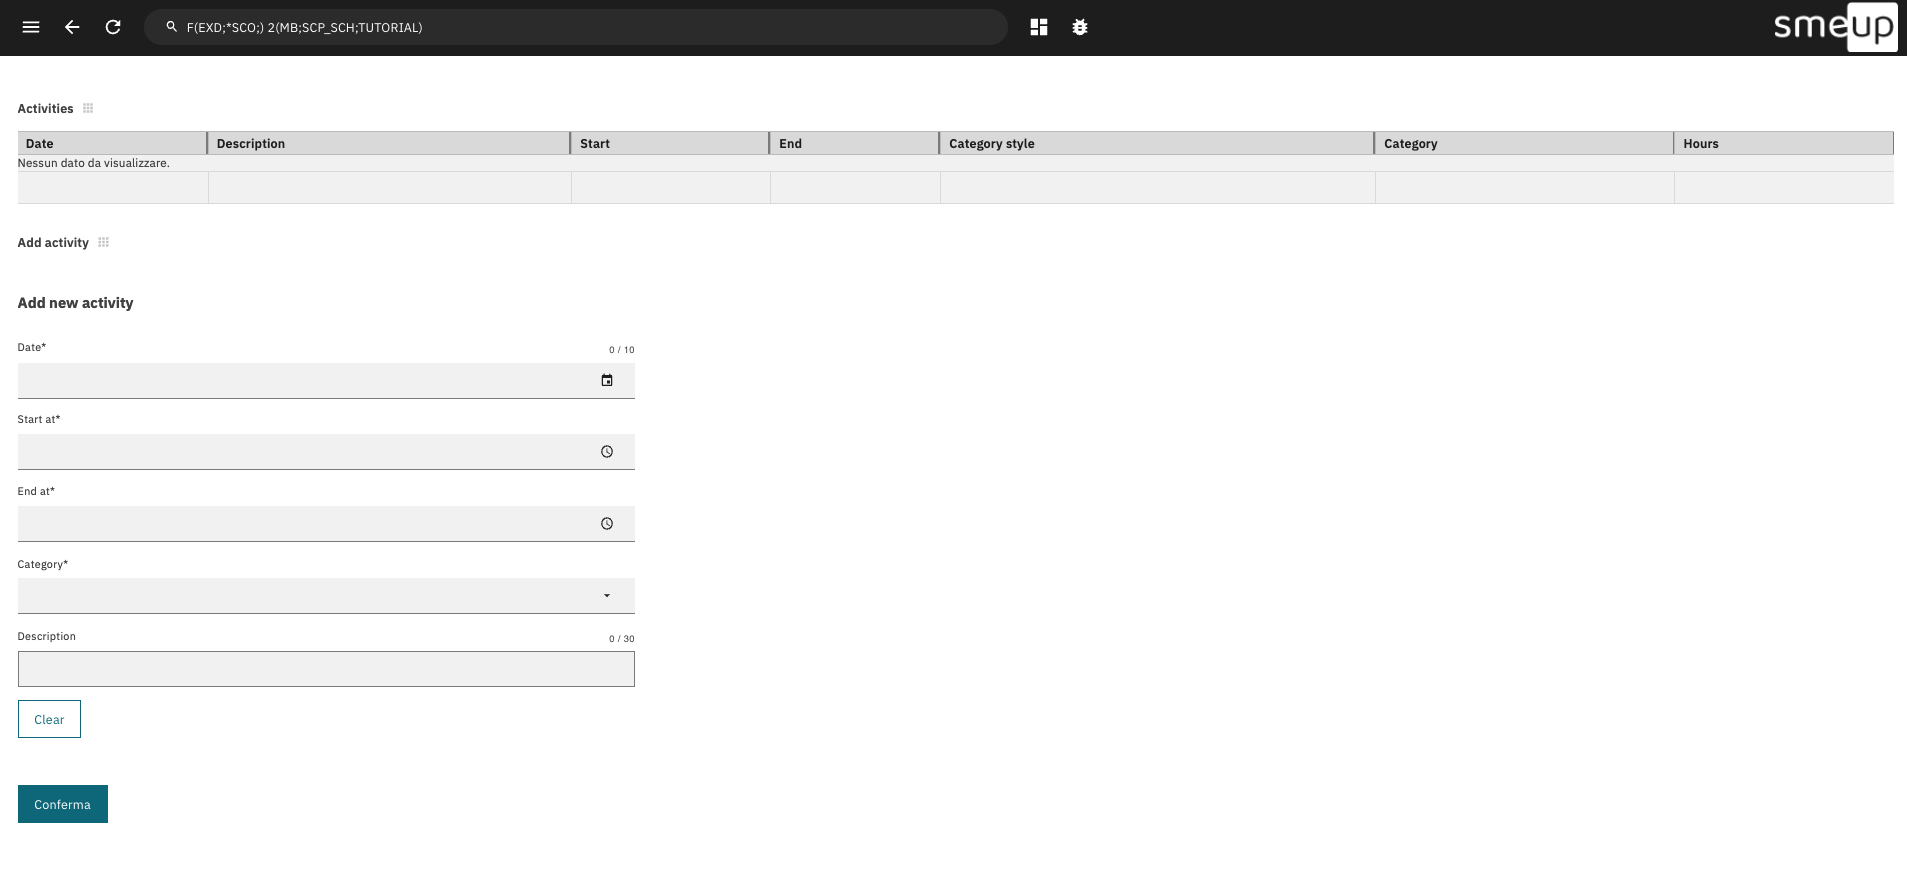
::G.SUB.INP Tit="Add activity"
::D.FUN.STD F(EXB;X1_X01_02;*INIT)
Don’t worry if you don’t fully understand the syntax yet.
What’s important to know for now is that this creates a table of activities retrieved by calling
the X1_X01_01 service and displays the Input Panel provided by the X1_X01_02 service.
2. Open the scheda
In the search bar of the local webup.js, write the FUN to open the created scheda.
F(EXD;*SCO;) 2(MB;SCP_SCH;TUTORIAL)
